Configuring NP-View Server
Upon initial start, the Welcome screen shows the configuration wizard to guide the Administrator through the remaining configuration steps which include:
- Authentication
- Licensing
- Users
Configure Authentication
The following authentication options are available to configure in NP-View Server.
- Active Directory / LDAP
- Radius
- Local
Active Directory or LDAP
For Active Directory or LDAP authentication we use LDAPv3 TLS over port 389. If the communication returns an exception, we attempt unencrypted communication. We do not support LDAPS. Before starting, note that setup requires a dedicated Credential Binding Account (LDAP Administrator). The Credentials Binding Account must be included in at least one of the system groups for NP-View Server to query and link the users.
An example of a properly configured LDAP screen on NP-View is below:
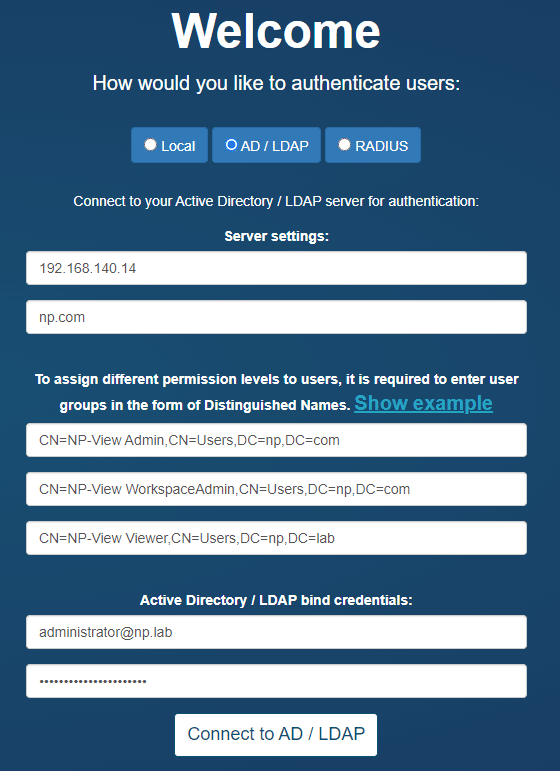
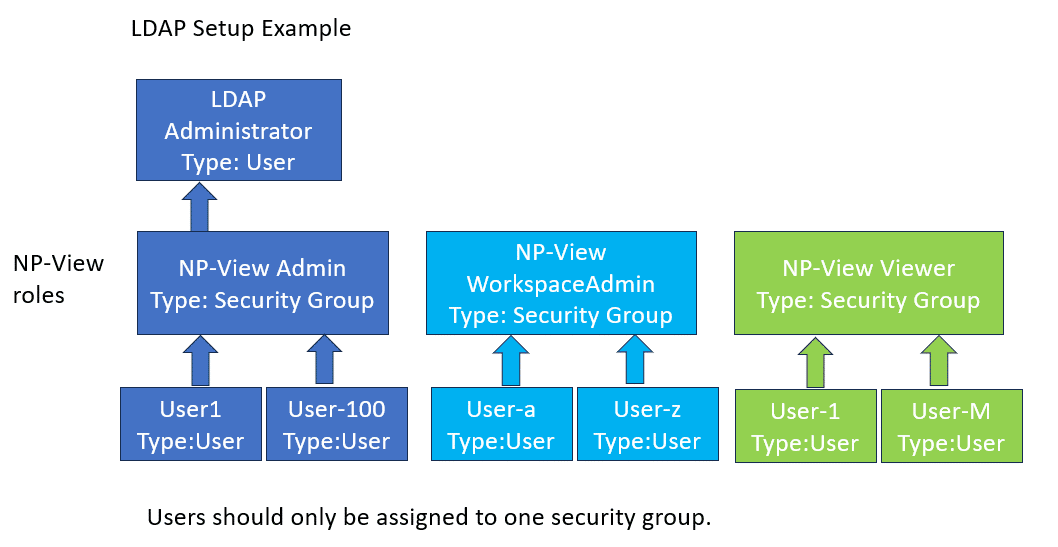
The setup page will allow for the definition of three system groups using a Distinguished Name. A Distinguished Name (often referred to as a DN or FDN) is a string that uniquely identifies an entry in the Directory Information Tree. The format of a DN is: CN=groupname,OU=grouptype,DC=subdomain,DC=example,DC=com. Your domain needs to match the DC specified in your DN. For an example DN like above, the domain would be: ‘subdomain.example.com’.
For example:
ldap_group_admin = 'CN=NP-Live Admin, OU=Permissions, DC=ad, DC=np, DC=test'

ldap_group_write = 'CN=NP-Live WorkspaceAdmin, OU=Permissions, DC=ad, DC=np, DC=test'

ldap_group_read = 'CN=NP-Live Viewer, OU=Permissions, DC=ad, DC=np, DC=test'
group_translation = {'Administrator' : ldap_group_admin,

'WorkspaceAdmin' : ldap_group_write,

'Viewer' : ldap_group_read}
Reminder: The three CN names must be unique or roles will be overlapped in NP-View resulting in features being disabled.
To find the DN on Windows, open a Windows command prompt on your Active Directory server and type the command: dsquery group -name "known group name".
Users assigned to NP-View must login once to get setup within the NP-View database for sharing and transferring of workspaces. No users exist until after the first login.
Radius
Radius authentication requires your server address and secret. Once input, the user can test their connection using their personal login credentials for verification. Note that for Radius authentication, all users are assigned to the Administrator group.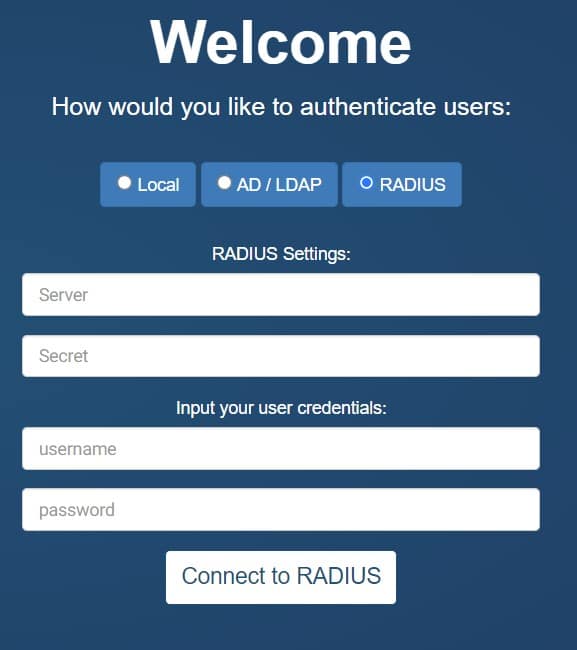
Local Authentication
NP-View Server provides an internal mechanism for the administration of users. During setup, the screen will require the user to setup the Administration account by inputting a user ID and password. This account will be assigned to the Administrator role and will have access to all system features. An example of a properly configured Local Auth screen on NP-View is below: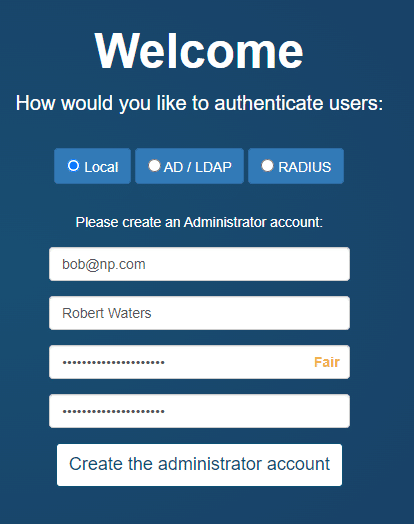
User Management
NP-View Server provides a User Management function for users assigned to the the Administrator role. It can be accessed in the user menu at the top right of the screen either on the workspace page or from within a workspace.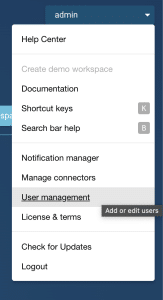
User Management – Active Directory or LDAP
Clicking User Management will open a window that shows the LDAP setup information. The left half of the screen allows the user to change the NP-View LDAP settings. LDAP Auth credentials are required to update the information. The optional email field override is used as the default email address for the Notification Manager if no email address is provided as part of the LDAP credentials.

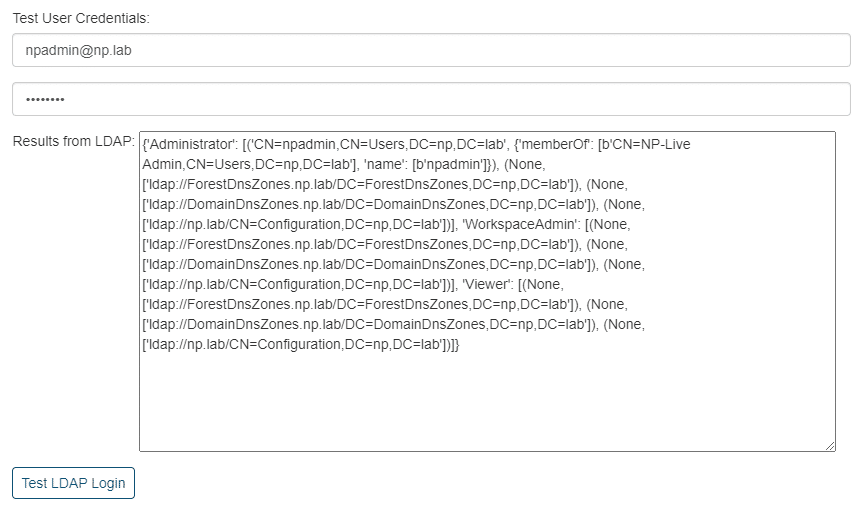
The right half of the user management screen allows for the testing of each LDAP user and will retrieve their LDAP settings for review.
User Management – Local Authentication
Clicking User Management will open a window that shows the user related information associated with this account, their account details, and their account permissions.
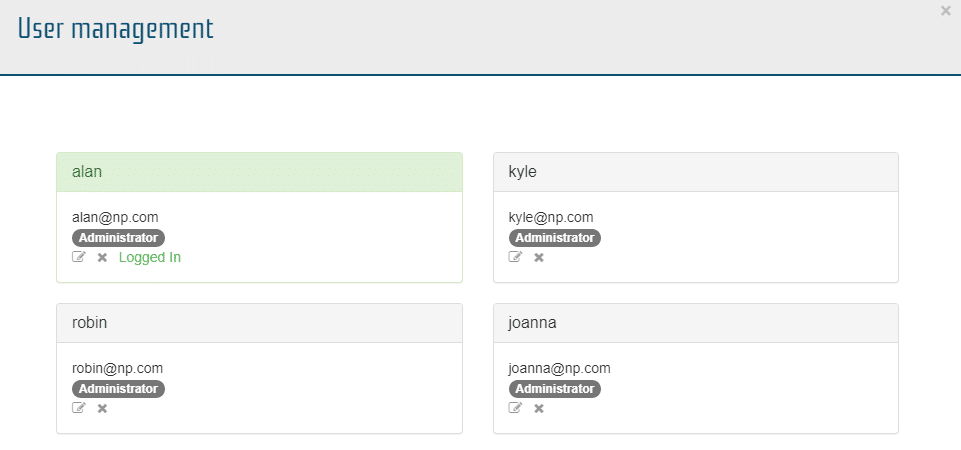
From this window Administrators can edit (pencil icon), delete (x icon) or add user accounts (create new user button).
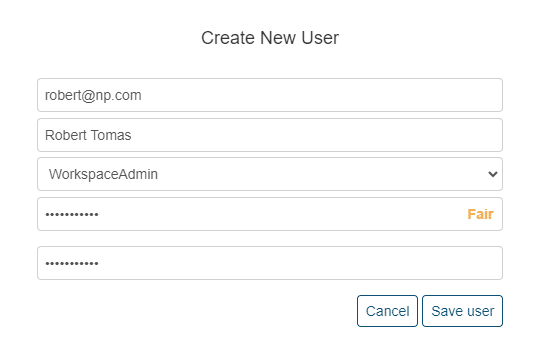
- Administrator – Has access to all users, workspace and system administration functions including managing users and license functions.
- WorkspaceAdmin – Has access to all workspace administration functions.
- Viewer – Has read only access to the system.
Reset Authentication
The Administrator can also reset the authentication method entirely by selecting the “Reset authentication system” link. “Reset authentication” only resets the authentication and does not remove any workspaces or data. Note that workspaces are assigned to user id’s. If the authentication method (or user id format) is changed, the workspaces will no longer be available to users. The administrator or workspace admin must utilize the transfer workspace function to assign the legacy workspace to the new user id’s.Password Reset
- Workspace Admin or Viewer user groups: Contact your Administrator who can manually reset your password through the User Management function on the system menu (upper right corner).
- Admins: connect through SSH to the NP-View server and remove the file db/auth_provider.cfg inside the NP-View application folder (by default: /opt/np-live).
- Refresh the NP-View web page to show the Welcome screen and reconfigure the authentication.
License and Terms
The Administrator can Show, Upgrade or Renew their license. Licensing terms and legal disclosures are available from the system menu where user management is found.
Configure License Key
After the authentication, the Welcome screen will guide the Administrator through reviewing the EULA and adding the license key. The license key should have been sent to you by email and also posted on the Network Perception portal. If you haven’t received a key, please send a request to support@network-perception.com. Renewed or upgraded license keys can only be installed from the home screen (not from within a workspace) by members of the Administrator group.Additional Configuration Features
Configure Automatic Updates
NP-View Server can automatically download new releases and update itself if you select “Automatically check for updates”. Alternatively, you can select “Update NP-View” from the upper right menu or update offline using the following steps:- Download the latest release from the Network Perception portal.
- Copy the release file to the NP-View Server using SCP or WinSCP
- Connect to the NP-View Server shell using SSH and execute the release file with the command
sudo sh NP-View_server_installer.sh
Configure Shutdown and Startup Options
To speed performance on startup, NP-View terminates background processes that are running when the system is gracefully shutdown and clears out all tasks and jobs. If any processes remain upon startup, they are also terminated. To change the configuration,- stop the NP-View Server application.
- in the docker-compose.yml file for the manager change
cancelTasksStartup=TruetocancelTasksStartup=False - in the docker-compose.yml file for the manager change
clearRqStartup=TruetoclearRqStartup=FalseNote that the previous setting must also be set to True for this operation to work. - start the NP-View Server application.
Configure User Timeout
The system can be configured automatically time out a user after a period of idle days. The default is set to 30 days. To change the configuration,- stop the NP-View Server application.
- in the docker-compose.yml file for the webserver\environment service, change
sessionLengthDays=30to any positive floating point number representing elapsed days. For Example:- 0.5 = 12 hrs
- 1.5 = 36 hours
- 30 = 720 hrs.
- If set to 0, user timeout will default to 30 minutes.
- start the NP-View Server application.
Configure Devices within a Custom View
The system can be configured to allow for more devices within a custom view. The default is set to 25 devices. To change the configuration:- stop the NP-View Server application.
- in the docker-compose.yml file for the
- services : manager : environment, change
devCountLimit=25to a positive integer. - services : bgmanager : environment, change
devCountLimit=25to a positive integer. - services : webserver : environment, change
devCountLimit=25to a positive integer.
- services : manager : environment, change
- start the NP-View Server application.
